

Roof Flashing Installation and Repair — Atlanta's Quality Standard
Proper flashing separates a roof that lasts from a roof that leaks. GAF-certified installation with ice and water shield underlayment at every roof-to-wall junction.
Certified by Industry-Leading Manufacturers
What Is Roof Flashing and Why Does It Matter?
Roof flashing is thin metal — typically aluminum, galvanized steel, or copper — installed at every point where a roof surface meets a vertical structure or changes direction. Chimneys, walls, dormers, skylights, valleys, pipe penetrations, and roof-to-wall junctions all require flashing to channel water away from vulnerable seams and onto the shingle field where it can shed properly. Without flashing, water follows gravity into every gap, seam, and joint that shingles alone cannot seal.
The shingles on a roof are designed to shed water that lands on their surface. They are not designed to prevent water from entering at transitions. That is the job of flashing. A roof with perfect shingle installation and defective flashing will leak. A roof with average shingle work and proper flashing integration will stay dry. The hierarchy is that clear, and it is the reason experienced roofing inspectors look at flashing first when diagnosing a leak.
In metro Atlanta, flashing failures are the single most common source of residential roof leaks. Georgia's climate accelerates the problem: thermal cycling between 95-degree summer days and winter freezes causes metal flashing to expand and contract hundreds of times per year. Wind-driven rain from summer thunderstorms and tropical system remnants pushes water laterally against gravity — exactly the condition that exposes inadequate flashing installations. A flashing detail that might survive ten years in a mild, dry climate can fail in three to five years in Atlanta if the underlayment and integration sequence were not done correctly from the start.
For homeowners in Alpharetta, Buckhead, Sandy Springs, and throughout the metro area, understanding flashing is not an academic exercise. It is the difference between a roof system that performs for its full warranted life and one that develops interior water damage within a few years of installation. When 1 Source Roofing inspects a roof, flashing condition is the first thing our crews evaluate — because it tells us more about the quality of the original installation than any other single component. Call (404) 277-1377 to schedule your free inspection.
Why Most Roofing Contractors Get Flashing Wrong
Flashing is where the gap between a competent roofing contractor and a shortcut operation becomes unmistakable. The shingle field on a roof — the large, visible expanse of material — is relatively straightforward to install. Flashing is not. It requires understanding how water moves at transitions, how different building materials interact, how thermal cycling affects metal-to-masonry and metal-to-siding connections, and how to sequence underlayment and metal in the correct order so that each layer directs water outward rather than trapping it.
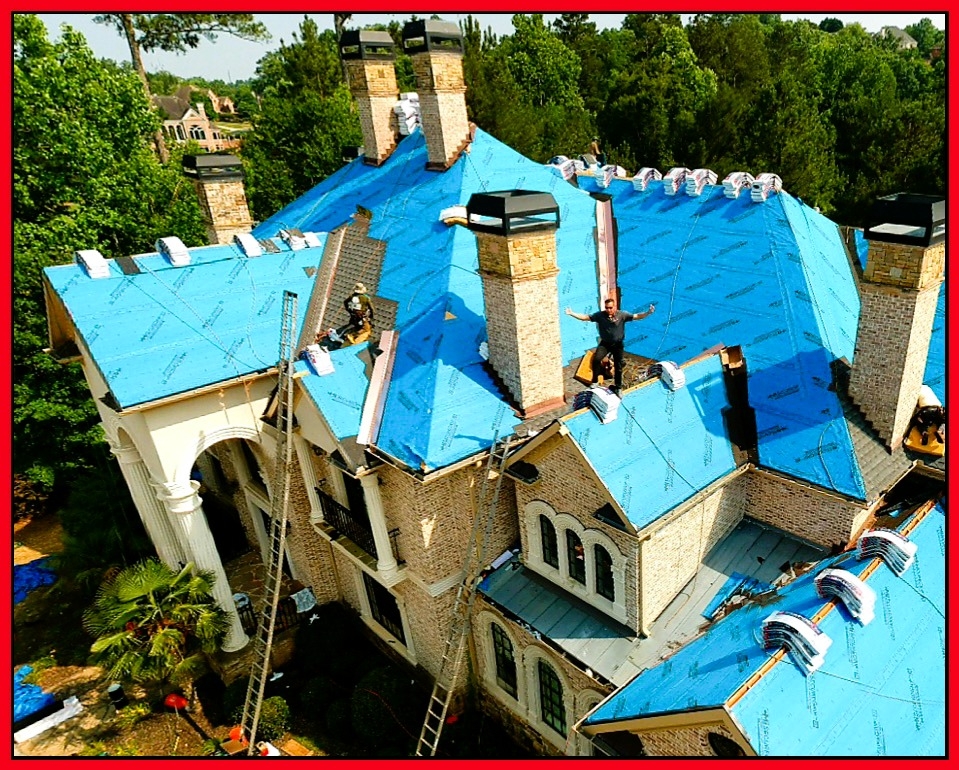
.jpg)
Most roofing contractors treat flashing as an afterthought. They install shingles across the open field and address flashing transitions with whatever method gets them off the roof fastest. The most common shortcut is tucking new flashing behind existing siding without removing the siding, without installing ice and water shield underlayment, and without verifying that the flashing integrates properly with the wall's weather-resistant barrier. This method looks finished from the ground. It fails within two to five years when water finds the path that was left open behind the metal.
The second most common shortcut is relying on sealant — caulk, roofing cement, or mastic — as a substitute for proper mechanical integration. Sealant has a place in roofing, but it is not a substitute for correct flashing sequence. Every sealant product on the market has a finite lifespan. Polyurethane sealants degrade under UV exposure. Roofing cement cracks as it ages. When the sealant fails — and it will — the flashing detail it was compensating for begins leaking. The homeowner calls for a repair, the repair contractor applies more sealant, and the cycle continues until the wall assembly behind the flashing is saturated and the damage extends far beyond the original flashing location.
A third common failure point is using the wrong flashing material for the application. Aluminum flashing against a concrete chimney corrodes through galvanic reaction. Galvanized steel in coastal or high-humidity environments develops rust that compromises the seal. Improperly gauged metal bends, warps, or lifts under wind load. Material selection is part of the specification process, and it matters.
The 1 Source Standard: Every flashing installation follows GAF manufacturer specifications. Ice and water shield at all roof-to-wall junctions. Siding removed and reinstalled at every sidewall transition. No sealant-dependent details. No shortcuts that trade long-term performance for same-day completion.
This approach costs more in labor and time than the tuck-and-seal method that most contractors use. It also means the flashing will perform for the full life of the roof — and that the manufacturer warranty remains valid at every flashing location. For homeowners investing in a premium roof on a high-value Atlanta home, the cost difference between proper flashing and shortcut flashing is negligible relative to the cost of interior water damage from a failed detail. See our technical flashing standards page for the full specification breakdown.
The GAF Ice and Water Shield 5-Inch Sidewall Requirement
GAF's current installation specifications require ice and water shield to extend a minimum of 5 inches up the sidewall at every roof-to-wall junction before step flashing or wall flashing is installed. This is not a recommendation. It is a requirement for installations performed under GAF certification — and it is one of the most frequently skipped steps in residential roofing across metro Atlanta.
The purpose of this requirement is straightforward. Flashing relies on mechanical overlap to direct water away from the wall. Under normal conditions — rain falling vertically onto a sloped surface — properly installed flashing sheds water reliably. But Atlanta does not produce exclusively normal conditions. Summer thunderstorms push wind-driven rain horizontally and upward against roof surfaces. Tropical system remnants bring sustained, heavy rainfall from shifting directions. During these events, water can migrate laterally behind flashing and into the wall assembly through gaps that are invisible during dry-weather inspection.
Ice and water shield is a self-adhering, rubberized asphalt membrane that bonds directly to the wall sheathing. It creates a watertight barrier that remains effective even if water bypasses the flashing — because the membrane is sealed, not lapped. Water that gets behind the flashing hits the ice and water shield and drains downward onto the roof surface rather than penetrating the wall cavity. Without this membrane, any water that bypasses the flashing enters the wall directly.
Critical Detail: The 5-inch minimum measurement is from the roof surface upward along the wall. This means the ice and water shield must be installed on the wall sheathing before the flashing is placed, and before the siding is reinstalled. The siding then covers the top edge of the membrane, and the flashing laps over the bottom edge onto the roof surface. The sequence matters: sheathing, then membrane, then flashing, then siding. Reversing any step in this sequence compromises the waterproofing.
Most residential roofing crews in metro Atlanta do not carry ice and water shield for sidewall application as a standard practice. They install it at eaves and valleys — where building code requires it — but skip the sidewall application because it requires siding removal, additional material, and longer installation time. The result is a roof that passes a casual visual inspection but lacks the secondary waterproofing that the manufacturer specification requires.
For homeowners, the practical consequence is significant. A GAF warranty is contingent on installation per GAF specifications. If a flashing leak develops at a location where ice and water shield was not installed — and GAF's inspection confirms the specification was not met — the warranty claim can be denied. The homeowner is left paying out of pocket for water damage that the warranty was supposed to cover. 1 Source Roofing installs ice and water shield at every sidewall junction on every project because it is the correct specification and because it protects both the home and the homeowner's warranty coverage.
For more detail on how this requirement integrates with the broader roofing system, see our roofing technical standards page.
Concerned About Your Roof Flashing?
Our inspectors evaluate every flashing detail — step, chimney, wall, and valley. Inspections are always free.

Siding Removal: The Difference Between Proper Flashing and a Future Leak
To install flashing correctly at any roof-to-wall junction — unless the exterior is brick — the siding must be removed. There is no shortcut that produces the same result. The siding must come off so that ice and water shield can be applied directly to the wall sheathing, so that the flashing can be integrated into the weather-resistant barrier in the correct sequence, and so that the siding can be reinstalled over the completed assembly. Tucking flashing behind existing siding without removing it is the single most common flashing installation shortcut in residential roofing, and it is responsible for a disproportionate share of the leak callbacks that roofing companies accumulate over time.
The mechanics of the failure are predictable. When flashing is tucked behind siding without removal, the installer is working blind. They cannot see the wall sheathing. They cannot apply ice and water shield to the sheathing because the siding is covering it. They cannot verify that the flashing integrates with the wall's weather-resistant barrier because the barrier is hidden. The flashing sits behind the siding's bottom edge, held in place by friction and sealant rather than by proper layering. Wind movement flexes the siding. Thermal expansion shifts the metal. Within two to five years, the sealant degrades and gaps open between the flashing and the wall surface. Water enters.
Proper siding removal and reinstallation adds time and labor cost to a flashing installation. On a typical Atlanta residential roof with four to six roof-to-wall junctions, the siding work might add half a day to the project timeline. The trade-off is a flashing installation that lasts the full warranted life of the roof versus one that begins failing within a few years. For homeowners making a $15,000 to $40,000 investment in a new roof on a home valued at $800,000 or more, the marginal cost of doing the flashing correctly is not a meaningful percentage of the total project — but the consequences of doing it wrong can include tens of thousands of dollars in interior water damage remediation.
The Insurance Angle: When Siding Removal Leads to Full Exterior Coverage
When a roof replacement is the result of storm damage — hail, wind, or fallen debris — and the insurance claim includes flashing replacement, the cost of siding removal and reinstallation at flashing locations is a legitimate part of the insured scope of work. The insurance company is responsible for returning the home to its pre-loss condition, and that includes the siding work required to install flashing per manufacturer specification.
Where this becomes particularly significant is on homes where the siding removal for flashing touches a large percentage of the home's exterior walls. On a home with multiple roof-to-wall junctions, dormers, and sidewall transitions, the cumulative scope of siding removal can affect enough of the exterior that the remaining, untouched sections no longer match. When the reinstalled siding has been repainted or replaced and the adjacent sections have not, the color mismatch creates a visible inconsistency that constitutes an incomplete restoration.
1 Source has successfully documented claims where insurance covered the cost of repainting an entire house because the scope of siding removal for proper flashing integration affected enough of the exterior to require a full repaint for color consistency. This is not an uncommon outcome — but it requires a contractor who understands how to document the scope accurately and present it to the adjuster with manufacturer specifications, photos, and a written justification. Most roofing contractors do not pursue this level of documentation because most roofing contractors do not remove siding for flashing in the first place.
For homeowners filing insurance claims for storm damage, working with a contractor who follows manufacturer flashing specifications can have a direct, measurable financial impact. The same quality standard that produces a leak-free roof also produces a complete insurance settlement. See our insurance claims assistance page for more information on how 1 Source represents homeowners through the adjuster process.
Types of Roof Flashing We Install
Every transition point on a roof requires a specific type of flashing, sized and shaped for that particular junction. Using the wrong type — or a generic substitute — compromises the water management at that detail. 1 Source Roofing crews are trained on all flashing types and install each per manufacturer specification.
Step Flashing
L-shaped pieces of metal installed at each shingle course where a roof meets a sidewall. Each piece overlaps the one below it, creating a stair-step pattern that channels water away from the wall and onto the shingle field. Step flashing must be integrated with ice and water shield on the wall sheathing and woven into the shingle courses — not installed as a continuous strip.
Step Flashing Details →Chimney Flashing
A multi-component system consisting of base flashing (L-shaped metal at the chimney base), step flashing along the chimney sides, counter flashing (embedded in the masonry mortar joints), and a cricket or saddle on the upslope side of chimneys wider than 30 inches. Chimney flashing is the most complex flashing detail on a residential roof.
Chimney Flashing Details →Wall and Sidewall Flashing
Continuous or stepped metal installed where a roof slope meets a vertical wall surface. This is the flashing type most affected by the siding-removal requirement — and the one most commonly installed incorrectly by contractors who skip the siding step. Wall flashing must extend under the siding and over the shingle surface with ice and water shield behind it.
Wall Flashing Details →Valley Flashing
Metal channel installed in the valley where two roof slopes converge. Valley flashing handles the highest volume of concentrated water flow on a roof — all the runoff from both adjacent slopes channels into the valley line. Open metal valleys with properly crimped center ridges outperform woven or closed-cut valley methods in high-rainfall climates like Atlanta's.
Valley Standards →Each flashing type has specific material, gauge, dimension, and installation sequence requirements. Installing step flashing where chimney counter flashing is needed, or using a continuous strip where individual stepped pieces are required, creates a detail that will fail under conditions the correct installation would have handled. Our technical flashing standards page documents the specification for each type.
Stucco Houses: The Highest Risk for Flashing Leaks
Stucco exteriors present the most demanding conditions for roof flashing installation. Unlike vinyl, wood, or fiber cement siding, stucco cannot be removed and reinstalled as part of a flashing project. It is a rigid, cement-based coating applied directly to the wall sheathing over metal lath and a scratch coat. Once it is in place, it stays in place — which means every flashing detail on a stucco house must be integrated with permanent precision.
The difficulty compounds in several ways. First, stucco is porous. It absorbs moisture through its surface, which means water that contacts the stucco-to-flashing junction does not simply bead off the way it would on vinyl siding. It wicks into the stucco material and migrates toward the wall sheathing behind it. Second, stucco does not flex. Where vinyl or wood siding accommodates minor thermal movement in the flashing without breaking the seal, stucco cracks. Hairline cracks at flashing-to-stucco junctions are common on stucco homes older than five years, and each crack is a potential entry point for water.
Third, stucco traps moisture against the wall assembly more effectively than breathable cladding materials. When water bypasses the flashing and enters the wall cavity on a vinyl-sided home, the siding's natural gaps allow some drying potential. Stucco provides no such relief. Moisture trapped behind stucco saturates the sheathing, degrades the structural framing, promotes mold growth in the wall cavity, and causes interior damage that may not become visible until the problem is advanced.
For stucco homes in metro Atlanta: Ice and water shield behind the flashing is not optional — it is the only reliable barrier between the flashing detail and the wall assembly. Without it, the flashing-to-stucco junction is a leak waiting for the first sustained wind-driven rain event to activate it. Every stucco home 1 Source Roofing works on receives ice and water shield at every flashing location, with counter flashing embedded in reglets cut into the stucco surface where applicable.
Atlanta's housing stock includes thousands of stucco homes in Buckhead, Sandy Springs, Alpharetta, and Johns Creek — many built during the 1990s and 2000s construction boom. A significant number of these homes have flashing installations that predate the current GAF ice and water shield requirements. If your stucco home is due for a roof replacement, the flashing integration at every wall junction, chimney, and dormer should be evaluated as the first priority of the project scope — not an afterthought handled after the shingles are on. See our stucco flashing page for the detailed specification.
How 1 Source Follows Manufacturer Flashing Specifications
Every flashing installation 1 Source Roofing performs follows the same sequence — regardless of the project size, the neighborhood, or the material budget. The standard does not change because the standard is the manufacturer specification, and deviating from it voids the warranty coverage that our clients are paying for.
- Inspection and Documentation Before any material is ordered or work begins, our inspectors evaluate every flashing location on the roof. Each junction is photographed, measured, and assessed for existing damage. The exterior cladding type at each location is documented — vinyl, wood, stucco, fiber cement, or brick — because the cladding determines the installation approach. This documentation becomes part of the project file and, where applicable, the insurance claim submission.
- Siding Removal at All Non-Brick Junctions Siding is removed at every roof-to-wall junction where the exterior is not brick. The removal is performed carefully to preserve the existing siding material for reinstallation. On homes where siding sections are damaged or aged beyond reinstallation, replacement siding is specified in the project estimate. The exposed wall sheathing is inspected for moisture damage or deterioration before proceeding.
- Ice and Water Shield Application Self-adhering ice and water shield membrane is applied to the wall sheathing, extending a minimum of 5 inches up the wall from the roof surface. The membrane overlaps onto the roof deck to create a continuous waterproof barrier from the roof surface up the wall. All seams are rolled for full adhesion. On stucco homes, the membrane is applied to the sheathing accessible behind reglet cuts.
- Flashing Installation Per Type Step flashing, wall flashing, chimney flashing, or valley flashing is installed according to the specific detail requirements of each junction. Each piece is sized, bent, and fastened per manufacturer specification. Flashing is integrated with the shingle courses and the ice and water shield in the correct layering sequence: sheathing, membrane, flashing, shingles below and siding above.
- Siding Reinstallation and Finishing Siding is reinstalled over the completed flashing assembly. The siding's bottom edge covers the top of the flashing, providing a finished appearance and an additional layer of weather protection. On homes where the siding reinstallation affects enough of the exterior to create color inconsistency, we document the scope for insurance or discuss repainting options with the homeowner.
- Final Inspection and Photo Documentation Every flashing detail is photographed after completion and reviewed against the manufacturer specification checklist. The homeowner receives a written completion report documenting the work performed at each location. This documentation protects the homeowner's warranty claim eligibility and provides a record of the installation quality for future reference.
This process takes longer than the tuck-and-seal approach. It requires more material, more skilled labor, and more coordination when siding is involved. It also produces a flashing installation that does not leak — which is the entire point of the detail. For a detailed overview of our technical standards across all roofing components, see our roofing technical standards page.
Ready for a Flashing Installation Done Right?
1 Source Roofing serves Alpharetta, Buckhead, Sandy Springs, Johns Creek, and all metro Atlanta communities. Free inspections with written documentation.
Call (404) 277-1377 for Your Free InspectionRoof Flashing Installation Across Metro Atlanta
1 Source Roofing performs flashing installation and repair throughout the Atlanta metro area, operating from our Lawrenceville base to serve homeowners within a 30-mile radius. Flashing conditions and failure patterns vary across the region based on home age, construction style, and exterior cladding — and our crews bring direct experience with the specific roofing challenges of each community we serve.
Buckhead and Sandy Springs estates frequently feature complex multi-plane rooflines with numerous chimney, dormer, and sidewall flashing locations. These homes demand the highest level of flashing craftsmanship because the number of transition points multiplies the leak risk when any single detail is installed incorrectly. Alpharetta and Johns Creek developments built during the 1990s and 2000s often have stucco exteriors — the highest-risk cladding for flashing failures — and many are now at the age where original flashing installations are deteriorating.
We serve homeowners in Alpharetta, Buckhead, Sandy Springs, Johns Creek, Roswell, Marietta, Duluth, Lawrenceville, Kennesaw, Suwanee, and surrounding communities throughout Gwinnett, Fulton, Cobb, Cherokee, Forsyth, and Dekalb counties.
Atlanta Homeowners on Their Flashing Experience
"We had a persistent leak at the chimney that two other contractors couldn't fix. 1 Source removed the siding, installed ice and water shield, and re-flashed the entire junction. No more leak — it's been two years."
David M. — Sandy Springs, GA
"The insurance adjuster approved our full roof replacement plus exterior repainting because of how much siding had to come off for proper flashing. 1 Source handled the documentation — we didn't have to negotiate anything ourselves."
Karen L. — Alpharetta, GA
Frequently Asked Questions About Roof Flashing in Atlanta
Answers to the questions Atlanta homeowners ask most about flashing installation and repair
Why does GAF require ice and water shield 5 inches up the sidewall before installing flashing?
GAF requires ice and water shield extending a minimum of 5 inches up the sidewall behind flashing to create a secondary waterproof barrier. Flashing alone relies on mechanical overlap to shed water. When wind-driven rain pushes moisture laterally — or when thermal cycling causes metal flashing to expand and contract — water can migrate behind the flashing and into the wall assembly. The ice and water shield acts as a self-sealing membrane that prevents any moisture that bypasses the flashing from reaching the wall sheathing or interior. Without this underlayment, flashing locations remain vulnerable to leaks regardless of how well the metal is installed. Call (404) 277-1377 for a free flashing inspection.
Does siding need to be removed to install flashing properly?
Yes — unless the exterior is brick. Proper flashing installation requires removing the siding at every roof-to-wall junction so that ice and water shield can be applied directly to the wall sheathing, flashing can be integrated into the weather barrier in the correct sequence, and the siding can be reinstalled over the flashing. When contractors skip this step and tuck flashing behind existing siding, they create a channel for water intrusion that no amount of caulk can permanently seal. 1 Source Roofing removes and reinstalls siding on every flashing project because it is the only method that meets manufacturer specifications.
How much does roof flashing installation cost in Atlanta?
Flashing costs depend on the type (step, chimney, wall, valley), the linear footage involved, the exterior cladding material, and whether ice and water shield underlayment is included. A proper installation that includes siding removal, ice and water shield, new metal flashing, and siding reinstallation costs more than a shortcut tuck-behind job — but it lasts the full life of the roof without leaking. 1 Source provides free inspections and detailed written estimates. Call (404) 277-1377 to schedule.
Why are stucco houses at higher risk for flashing leaks?
Stucco is a rigid, porous cladding that cannot be removed and reinstalled the way vinyl or wood siding can. Any gap between the flashing and the stucco surface becomes a direct entry point for water. Stucco also traps moisture against the wall sheathing more readily than breathable cladding materials. Without ice and water shield underlayment behind the flashing, water that migrates past the flashing-to-stucco junction has no secondary barrier and saturates the wall assembly. Metro Atlanta has thousands of stucco homes in communities like Buckhead, Alpharetta, and Johns Creek that require a contractor who understands these specific moisture dynamics.
Can insurance cover siding removal and repainting for proper flashing installation?
In many cases, yes. When a storm damage claim requires flashing replacement and the siding must be removed to install flashing correctly, the cost of siding removal, reinstallation, and repainting is a legitimate part of the scope of work. 1 Source has successfully documented claims where insurance covered the cost of repainting an entire house because the siding removal scope affected enough of the exterior to require a full repaint for color consistency. This outcome requires a contractor who documents the scope accurately and presents it with manufacturer specifications. Call (404) 277-1377 to discuss your claim.
GAF Flashing Installation Details
Every flashing installation by 1 Source Roofing follows manufacturer specifications. These official GAF documents detail the exact methods, materials, and requirements for proper flashing installation — including the critical ice and water shield sidewall requirement that protects against leaks.