

Wall and Sidewall Flashing — The Detail Most Contractors Miss
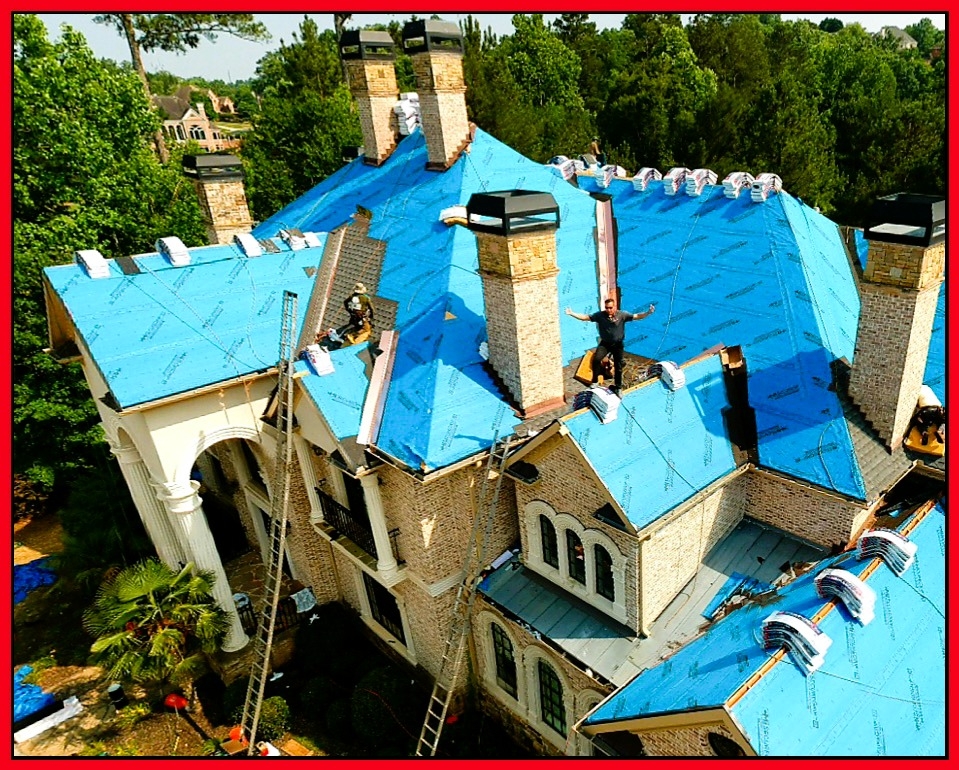
Ice and water shield 5 inches up the sidewall. Siding removed and reinstalled. No shortcuts. This is where quality separates from liability.
Certified by Industry-Leading Manufacturers
Why Wall and Sidewall Flashing Is the Most Important Detail on Your Roof
Every roof has edges. And every edge where a roof plane meets a vertical wall is a potential entry point for water. Wall flashing exists for one purpose: to bridge the transition between two different building surfaces and direct water away from the joint where they meet. When wall flashing is installed correctly, water runs off the roof, hits the flashing, and is redirected into the gutter system without ever touching the wall cavity behind it. When it is installed incorrectly, or when a contractor cuts corners on the installation process, water gets behind the cladding and into the wall framing where no homeowner can see it until the damage is already severe.
This is not a cosmetic detail. Wall flashing failures are the leading cause of hidden moisture intrusion in residential construction. The problem with hidden moisture is that it does not announce itself with dramatic ceiling stains the way a valley leak does. Water entering a wall cavity behind improperly installed flashing migrates downward through framing members, saturates insulation, promotes mold growth in enclosed spaces, and rots structural sheathing from the inside out. By the time the damage becomes visible on interior walls, the remediation scope has expanded from a flashing repair to a structural rebuild.
Atlanta's climate makes this problem worse. The combination of heavy rain events during Georgia's spring and summer thunderstorm season, sustained high humidity through September, and wind-driven rain during storm fronts creates conditions where even a minor flashing deficiency will result in moisture intrusion within a single season. A wall flashing installation that might survive for years in a dry climate will fail in metro Atlanta within months of a heavy storm season.
The reality of the residential roofing industry is that wall and sidewall flashing is the most commonly shortcut detail on a roof replacement. It takes time. It requires siding removal. It demands ice and water shield application up the wall surface before the metal goes on. The labor cost is real. And because homeowners cannot see the work once siding is reinstalled, many contractors skip the proper process entirely, knowing the failure will not become apparent until they are long gone from the project. This is the single biggest quality differentiator between a contractor who follows manufacturer specifications and one who does not.
GAF Now Requires Ice and Water Shield 5 Inches Up the Sidewall
GAF's current technical installation specifications include a requirement that has changed the standard of care for wall flashing installation across the industry. Before metal flashing is installed at any roof-to-wall junction, GAF now specifies that a self-adhering ice and water shield membrane must be applied a minimum of 5 inches up the vertical wall surface. This is not a recommendation. It is a specification that must be followed for the installation to comply with GAF's warranty requirements.
.jpg)
The engineering rationale is straightforward. Metal flashing at a wall junction creates a physical barrier, but metal alone is not watertight at its upper edge. Water can work behind the top edge of metal flashing through several mechanisms: capillary action draws moisture upward into the gap between the metal and the wall surface; wind-driven rain forces water horizontally past the metal edge during storms; and thermal cycling causes the metal to expand and contract against the wall, gradually opening gaps that did not exist at the time of installation. The ice and water shield membrane applied behind the flashing and up the wall creates a redundant waterproof barrier that catches any moisture that gets past the metal. The 5-inch vertical dimension ensures sufficient coverage to handle the standing water conditions that occur during heavy rain events.
What happens when this step is skipped: Without ice and water shield behind the flashing, the metal-to-wall junction is a single point of failure. The first time water gets past that edge, it enters the wall cavity with no secondary barrier to stop it. In stucco homes, this problem is particularly acute because stucco is porous and absorbs moisture readily. Water that reaches the stucco surface behind flashing wicks into the wall assembly and begins deteriorating sheathing, framing, and insulation. The repair scope escalates from a flashing correction to stucco removal, wall cavity remediation, structural repair, and stucco reapplication. We have seen this failure pattern on homes less than five years old where the original contractor did not apply ice and water shield at the wall junction.
CertainTeed's technical bulletins contain similar specifications for self-adhering membrane application at wall junctions. The industry consensus is clear: metal flashing alone is not sufficient for long-term waterproof performance at roof-to-wall transitions. The membrane-plus-metal approach is the standard of care, and any contractor who skips the membrane step is installing below the manufacturer's specified standard. For homeowners, the practical consequence is equally clear: if the membrane was not applied, the manufacturer warranty may not cover the resulting water damage.
1 Source Roofing applies ice and water shield at every wall junction on every roof we install. No exceptions. This is not an upsell or an add-on. It is part of the installation specification, and we follow the specification on every project because that is what the manufacturer requires and that is what protects the homeowner. If you are comparing roofing bids and another contractor's scope of work does not explicitly include ice and water shield at wall junctions, ask them why. The answer will tell you everything you need to know about how they approach the rest of your roof. Call (404) 277-1377 to schedule a free inspection of your existing wall flashing.
Why Siding Must Be Removed for Correct Wall Flashing Installation
Unless the exterior wall surface is brick, the siding must come off at the roof-to-wall junction to install flashing correctly. This is the step that separates a compliant installation from a shortcut. Vinyl siding, HardiePlank (fiber cement), wood clapboard, cedar shake, engineered wood siding, and T1-11 panel siding all must be removed to allow direct access to the wall sheathing beneath. There is no method of tucking flashing behind installed siding that produces a watertight result.
Here is why. The proper installation sequence requires the ice and water shield membrane to be applied directly against the wall sheathing, extending a minimum of 5 inches above the roof-to-wall intersection. The membrane must bond to the sheathing surface to create its waterproof seal. If siding remains in place, the membrane can only be applied to the back face of the siding, which is not a bondable surface and does not seal against the wall assembly. The metal flashing must then be installed over the membrane, with the upper edge extending up the wall behind where the siding will be reinstalled. The siding is then reinstalled over the top of the flashing assembly, creating a layered system that sheds water at every level.
The Correct Installation Sequence
- Remove Siding at the Roof-to-Wall Junction Siding is carefully removed from the courses that overlap the roof-to-wall intersection. The number of courses removed depends on the siding profile and the vertical dimension needed for proper membrane and flashing coverage. Siding pieces are labeled and stored for reinstallation.
- Inspect Wall Sheathing With siding removed, the wall sheathing is inspected for existing moisture damage, rot, mold, or deteriorated house wrap. Any compromised sheathing is replaced before proceeding. This inspection step is impossible without siding removal, which means contractors who skip removal also skip the only opportunity to catch existing wall damage before it is sealed behind new flashing.
- Apply Ice and Water Shield 5 Inches Up the Wall GAF StormGuard or equivalent self-adhering membrane is applied to the wall sheathing, extending from the roof deck surface up the wall a minimum of 5 inches. The membrane is pressed firmly to create a complete bond with the sheathing. This membrane is the secondary waterproof barrier that protects the wall cavity if any moisture ever gets past the metal flashing above it.
- Install Metal Wall Flashing Pre-formed metal flashing is installed over the membrane, with the horizontal leg extending onto the roof surface beneath the shingles and the vertical leg extending up the wall. The flashing is secured and sealed per manufacturer specification. Step flashing pieces overlap each other in sequence up the roof slope.
- Reinstall Siding Over the Flashing Assembly The siding courses are reinstalled over the top edge of the flashing, creating the final weather barrier. The siding covers the upper edge of the flashing and the exposed portion of the ice and water shield, completing the layered water-shedding system.
What happens when a contractor skips siding removal: The contractor slides flashing behind the bottom edge of the siding without removing it. The ice and water shield is either skipped entirely or applied to the back of the siding rather than the wall sheathing. The top edge of the flashing sits loosely behind the siding with no membrane seal behind it. Water enters at the first heavy rain, migrates behind the siding, saturates the sheathing, and begins rotting the wall framing. The homeowner does not discover the damage until interior symptoms appear — stained drywall, musty odors, or visible mold — at which point the wall cavity has been wet for months or years. The repair cost at that stage is measured in thousands of dollars, not hundreds.
Siding removal adds labor time to a roof replacement project. That is true. It also adds cost. But the cost of proper siding removal, membrane application, flashing installation, and siding reinstallation is a fraction of the cost of wall cavity remediation after a flashing failure. 1 Source Roofing removes siding at every roof-to-wall junction on every project where the exterior is not brick. Our crews are experienced in handling vinyl siding, HardiePlank, wood siding, and engineered wood products without damage. The siding goes back on the same day the flashing is installed. Call (404) 277-1377 to learn more about our wall flashing process.
Concerned About Your Wall Flashing?
Most wall flashing failures are invisible until the damage is advanced. A free inspection from 1 Source Roofing identifies problems before they become structural repairs.
Schedule Your Free Flashing InspectionWhen Insurance Pays to Paint Your Entire House
Here is something most homeowners do not know, and most contractors will not tell them. When a roof replacement requires siding removal on multiple walls for proper flashing installation, and the existing siding paint or finish cannot be perfectly matched after reinstallation, there are cases where the insurance carrier will approve coverage for repainting the entire house.
The logic is sound from an insurance perspective. The claim is for storm damage to the roof. Proper repair of the roof requires siding removal for flashing installation. Siding removal and reinstallation on multiple elevations creates visible inconsistency in the exterior finish. The homeowner is entitled to be made whole — meaning the home's exterior should look the same after the repair as it did before the damage. If achieving that standard requires repainting, the paint becomes part of the legitimate repair scope.
This does not happen on every project. It happens on projects where the siding is painted (rather than pre-finished vinyl), where multiple walls are affected by roof-to-wall transitions, and where the existing paint has weathered enough that removed and reinstalled sections are visibly different from the surrounding finish. On homes with complex rooflines that tie into siding on three or four walls, the scope of siding work can be extensive enough that the case for full exterior repainting is straightforward.
1 Source Roofing has documented full exterior repainting requirements on multiple projects where the scope of siding removal made color matching impractical, and insurance carriers approved the additional scope. We document the siding removal requirements, photograph the finish inconsistency, and submit the documentation to the adjuster with the same thoroughness we bring to every aspect of the project. This is a real, tangible financial benefit to the homeowner — a benefit that only exists because we do the flashing work correctly in the first place. A contractor who skips siding removal never creates the documentation trail that supports the paint claim, because the siding was never removed.
If your home has storm damage and a complex roofline with multiple wall-to-roof transitions, call (404) 277-1377 to discuss your project. We attend every adjuster meeting to show the documented damage and provide a detailed estimate for the full scope of work, including exterior painting when the repair scope warrants it. See our Insurance Claims Assistance page for details on how we document damage and support homeowners through the claim process.
Types of Wall Flashing and Where Each Is Used
Wall flashing is not a single product. It is a category of metal components designed for specific transition conditions on a roof. Each type serves a distinct purpose, and using the wrong type at the wrong location — or omitting one entirely — creates a failure point that water will find. Here is what every homeowner should understand about the flashing types that protect their home.
Headwall Flashing (Continuous Apron Flashing)
Headwall flashing is installed at the horizontal junction where a roof slope terminates into a vertical wall running perpendicular to the slope. The most common example is a single-story addition or garage roof that meets the side of a two-story section. The flashing runs as a continuous piece along the full width of the junction, with its lower leg extending onto the roof surface beneath the shingle courses and its upper leg extending up the wall behind the siding.
Headwall flashing is sometimes called apron flashing. In either case, the function is identical: it creates a continuous metal barrier across the entire width of the horizontal roof-to-wall junction. Because the junction is horizontal, there is no point where water can flow sideways and bypass the flashing. The critical installation detail is the vertical leg height and the membrane application behind it — the same 5-inch ice and water shield requirement applies at headwall conditions.
Sidewall Flashing (Step Flashing)
Sidewall flashing is installed where a roof slope runs parallel to a vertical wall. This is the more complex flashing condition because the junction runs at an angle — the roof surface is sloping while the wall is vertical, which means the flashing must account for water flowing both down the roof and along the wall-to-roof intersection simultaneously.
The standard method for sidewall flashing is step flashing: individual L-shaped metal pieces installed at each shingle course, with each piece overlapping the one below it. This creates a stepped, shingled effect along the wall that directs water outward onto each successive shingle course rather than allowing it to accumulate along the junction. Step flashing is installed with siding removed, ice and water shield applied to the wall sheathing, and each flashing piece integrated with the corresponding shingle course. For more detail on step flashing technique, see our Step Flashing Installation page.
Kick-Out Flashing
Kick-out flashing is a specially formed diverter installed at the bottom termination of a sidewall flashing run — the point where the roof slope ends at a wall and transitions to open air or a gutter. This is one of the most important and most frequently omitted flashing components in residential roofing.
Without kick-out flashing, water flowing down the sidewall junction reaches the bottom of the flashing run and has nowhere to go except down the wall surface below. On a home where the roof terminates into a wall above a window, door, or lower wall section, this water sheets directly down the exterior wall, saturates the siding, and penetrates behind the cladding at every seam, joint, and penetration it encounters. The resulting wall cavity damage can be extensive and is frequently the source of mold problems in homes that appear structurally sound from the outside.
A kick-out diverter redirects that water away from the wall face and into the gutter. The piece is bent at an angle that launches the water outward, preventing it from following the wall surface downward. Building codes in many jurisdictions now require kick-out flashing at all sidewall terminations, and both GAF and CertainTeed include kick-out flashing in their installation specifications for compliant warranty coverage.
Continuous vs. Stepped Wall Flashing
Headwall conditions use continuous flashing — a single uninterrupted piece spanning the full width of the junction. Sidewall conditions use stepped flashing — individual overlapping pieces that follow the roof slope. These are not interchangeable methods. A continuous piece of flashing installed along a sidewall junction will not integrate correctly with the shingle courses and creates channels where water pools rather than draining. Stepped flashing installed at a headwall condition leaves gaps between pieces that water penetrates. The correct method depends on the geometry of the junction, and a qualified installer will use the right type at each location without exception.
Wall Flashing Materials: Galvanized Steel, Aluminum, and Copper
The metal used for wall flashing determines its longevity, corrosion resistance, and compatibility with the surrounding roofing materials. Each material has specific advantages and appropriate applications.
Galvanized Steel
Galvanized steel is the standard material for residential wall flashing in the Southeast. The zinc coating provides corrosion resistance adequate for the 25- to 30-year lifespan of most asphalt shingle roofs. Galvanized flashing is rigid enough to maintain its formed profile over decades of thermal cycling, holds fasteners securely, and is the material specified in most manufacturer installation guides. For the majority of Atlanta-area homes, galvanized steel is the correct choice — it is durable, proven, and cost-effective. It forms cleanly, installs predictably, and is compatible with all standard asphalt shingle products.
Aluminum
Aluminum flashing is lighter than galvanized steel and offers strong corrosion resistance, which makes it appropriate for coastal or high-moisture environments. In the Atlanta market, aluminum is used less frequently for wall flashing because it is softer than steel and more susceptible to damage during the installation process — a bent or creased piece of aluminum flashing compromises its weather seal. Where aluminum is specified, the installer must handle the material with additional care. Aluminum is not compatible with concrete or masonry in direct contact, as an alkaline reaction can cause accelerated corrosion.
Copper
Copper is the premium flashing material for high-end custom homes, historic restorations, and properties where the homeowner values a permanent solution. Copper wall flashing will outlast the shingle roof above it — 70 to 100 years of service life is standard for architectural-grade copper. It develops a natural green patina over time that many homeowners on luxury properties consider an aesthetic asset. Copper does not corrode, does not require a protective coating, and maintains its structural integrity through unlimited thermal cycles. The material cost is substantially higher than galvanized steel, but for homes valued at $1.5 million and above — the kind of properties we regularly work on in Buckhead, Alpharetta, and Johns Creek — the lifetime value calculation favors copper in many cases.
1 Source Roofing selects flashing material based on the manufacturer specification for the roofing system being installed, the existing flashing material on the home (if partial replacement is involved), and the homeowner's goals for longevity and aesthetics. We discuss material options during the estimate process and include the flashing material specification in every written proposal.
Wall Flashing on Stucco Homes Requires Extra Attention
Stucco-clad homes present unique challenges for wall flashing installation that go beyond the standard siding removal process. Stucco is a cementitious coating applied directly to the wall sheathing (over lath and a moisture barrier), which means it cannot be "removed" and reinstalled the way vinyl siding or HardiePlank can. This changes the installation approach but does not reduce the requirement for proper ice and water shield application and correct flashing integration.
On stucco homes, the flashing must be counter-flashed — meaning a reglet (groove) is cut into the stucco surface, the flashing is inserted into the reglet, and the joint is sealed with a high-quality polyurethane sealant compatible with masonry surfaces. The ice and water shield membrane is applied to the wall surface beneath the stucco where accessible, or in some cases, the membrane is applied over the stucco surface below the reglet line and beneath the flashing assembly.
The risk on stucco homes is amplified because stucco is porous. Unlike vinyl siding, which sheds water off its face, stucco absorbs moisture. Any water that gets behind improperly installed flashing on a stucco home wicks into the stucco matrix, migrates through the wall assembly, and causes damage that is exceptionally difficult and expensive to remediate. Stucco removal and reapplication is a specialty trade, and the costs escalate rapidly once the stucco must be cut back for wall cavity repair.
GAF's specification for ice and water shield application at wall junctions was developed in part because of the high failure rate observed at stucco-to-roof transitions in the Southeast. The 5-inch membrane application behind the flashing is especially critical on stucco homes because the stucco itself cannot be relied upon as a water barrier. For detailed guidance on flashing at stucco transitions, see our Stucco Flashing Installation page.
This Is Where 1 Source Excels
Most contractors skip siding removal because it costs time and money. We follow manufacturer specifications on every project because your home deserves correct installation, not convenient shortcuts.
Call (404) 277-1377 for a Free InspectionWhy 1 Source Roofing Does Wall Flashing Differently
The roofing industry has a wall flashing problem. The problem is not technical — the correct methods are well documented in manufacturer installation manuals, in GAF and CertainTeed technical bulletins, and in the building code itself. The problem is economic. Proper wall flashing installation with siding removal, ice and water shield application, metal flashing integration, and siding reinstallation takes time. It requires a crew that understands the sequence. It costs more in labor than sliding a piece of metal behind a siding panel and calling it done.
That economic pressure drives the majority of roofing contractors in the Atlanta market to shortcut wall flashing on every project. They know the shortcut will not be visible once the job is finished. They know the homeowner cannot inspect the work behind the siding. And they know the failure, when it occurs, will happen months or years later — long after the warranty claim window on their workmanship has closed.
1 Source Roofing takes the opposite approach. We follow manufacturer specifications on wall flashing because that is the standard our certifications require, and because that is the standard our clients' homes deserve. We remove siding. We apply ice and water shield 5 inches up the wall. We install metal flashing per the manufacturer's documented procedure. We reinstall the siding the same day. We photograph every step of the process and include those photos in the project completion file.
This is not a marketing distinction. It is an operational one. Our crews are trained on the correct flashing sequence. Our project managers verify compliance at every wall junction on every project. Our written estimates include siding removal as a line item, not a hidden cost discovered after the project starts. When we tell a homeowner that their roof was installed to manufacturer specification, we mean every detail — including the ones that no one will ever see once the siding is back on the wall.
If you are comparing roofing bids, ask each contractor three questions about wall flashing: Do you remove siding at roof-to-wall junctions? Do you apply ice and water shield to the wall sheathing before installing flashing? Do you follow GAF's 5-inch sidewall membrane specification? If the answer to any of those questions is no — or if the contractor seems unfamiliar with the requirement — that tells you everything you need to know about the level of installation quality you can expect on the parts of the roof you cannot see.
Manufacturer Technical Bulletins on Wall Flashing
The specifications referenced throughout this page are not proprietary to 1 Source Roofing. They are published requirements from the manufacturers whose products we install. Homeowners who want to verify these standards can reference the following sources:
- GAF Pro Field Guide: Specifies ice and water shield application at all wall junctions, with minimum 5-inch vertical coverage on the wall surface. Includes detailed diagrams of headwall and sidewall flashing integration with the shingle field.
- GAF Residential Roofing Installation Manual: Covers step flashing, headwall flashing, and kick-out flashing requirements for all GAF shingle products. Compliance with this manual is required for GAF Golden Pledge and Silver Pledge warranty eligibility.
- CertainTeed Shingle Applicator's Manual: Details wall flashing procedures including membrane underlayment requirements at all roof-to-wall transitions. Specifies counter-flashing methods for masonry and stucco wall conditions.
- International Residential Code (IRC) Section R905.2.8.3: Requires flashing at all wall-to-roof intersections. References ASTM standards for metal flashing materials and installation methods.
- NRCA (National Roofing Contractors Association) Steep-Slope Manual: Provides industry-standard detail drawings for headwall, sidewall, and kick-out flashing conditions. Referenced by most manufacturer installation guides.
For a broader discussion of flashing standards and technical specifications, see our Flashing Technical Standards page and our Roofing Technical Standards overview. For information on underlayment and ice and water shield applications beyond wall flashing, see our Underlayment and Ice Dam Protection page.
Atlanta Homeowners on 1 Source Flashing Quality
"Our previous roofer never removed the siding. 1 Source found water damage behind three walls when they did the flashing correctly. They saved us from a much bigger problem."
David M. — Alpharetta, GA
"The crew removed the siding, applied the ice shield up the wall, installed the flashing, and put the siding back the same day. Professional from start to finish."
Karen L. — Sandy Springs, GA
Wall Flashing Installation FAQs
Common questions about wall and sidewall flashing from Atlanta homeowners
Why does GAF require ice and water shield 5 inches up the sidewall before installing flashing?
GAF's specification requires self-adhering ice and water shield applied a minimum of 5 inches up the vertical wall surface before metal flashing is installed. This creates a secondary waterproof barrier behind the flashing that catches any moisture working past the metal through capillary action, wind-driven rain, or thermal cycling gaps. Without this membrane, the metal-to-wall junction is a single point of failure. The 5-inch dimension provides enough vertical coverage to handle standing water during heavy Georgia thunderstorms. Call (404) 277-1377 to schedule a free inspection.
Does siding need to be removed to install wall flashing correctly?
Yes, unless the exterior wall is brick. Vinyl siding, HardiePlank, wood siding, and other cladding materials must be removed at the roof-to-wall junction. The ice and water shield membrane must bond directly to the wall sheathing, which is impossible with siding in place. The correct sequence is: remove siding, apply membrane to sheathing, install metal flashing, reinstall siding over the assembly. Tucking flashing behind installed siding creates a gap where water infiltrates the wall cavity.
What is kick-out flashing and why is it critical at wall-to-roof transitions?
Kick-out flashing is a formed metal diverter installed at the bottom of a sidewall flashing run where the roof terminates into a wall. Without it, water flowing down the sidewall junction sheets directly down the wall surface and penetrates behind the siding. Kick-out flashing redirects that water into the gutter system. It is one of the most frequently omitted components by contractors and one of the most common sources of hidden wall cavity damage in residential construction. Both GAF and CertainTeed include kick-out flashing in their warranty installation specifications.
Will my insurance cover repainting the house if siding has to be removed for flashing?
In many cases, yes. When proper flashing installation requires siding removal on multiple walls and the existing paint cannot be perfectly color-matched after reinstallation, insurance carriers may approve full exterior repainting to restore uniform appearance. 1 Source documents this requirement during the adjuster meeting and provides the photos and estimate for your insurer to review. This benefit only exists because we do the flashing work correctly — contractors who skip siding removal never generate the documentation that supports a paint claim. Call (404) 277-1377 to discuss your project.
What materials are used for wall flashing and which is best for my home?
Wall flashing is manufactured from galvanized steel, aluminum, or copper. Galvanized steel is the industry standard — durable, cost-effective, and specified in most manufacturer installation guides. Aluminum offers corrosion resistance but is softer and more damage-prone during installation. Copper is the premium choice for luxury homes, with a 70- to 100-year service life and natural patina development. 1 Source selects flashing material based on your roofing system manufacturer specifications, existing materials, and longevity goals. We include the flashing material specification in every written proposal.
GAF Flashing Installation Details
Every flashing installation by 1 Source Roofing follows manufacturer specifications. These official GAF documents detail the exact methods, materials, and requirements for proper flashing installation — including the critical ice and water shield sidewall requirement that protects against leaks.